Ad Tags: What are they
and why do you need them?
What are Ad Tags?
Ad tags, also known as ad code or ad snippets, are snippets of HTML or JavaScript code, provided by ad servers (i.e. the machines responsible for distributing ads) that publishers use to display ads on websites or in apps. These tags are what make it possible for the browser or app to request the ad information from the ad server and display it to customers. This information includes size, format, and other details about the ad needed to display it the way it was designed.
Why You Need Ad Tags
Aside from being essential for effective communication among publishers, ad servers, and advertisers, ad tags also ensure that your ads reach your target group based on demographics, browsing behavior, and other factors.
Ad tags also allow advertisers to make real-time adjustments to their ads and campaigns, whether it’s their target group or the ad creative itself.
They contribute to making ad editing and delivery an automated experience, improving scalability.
What does an Ad Tag look like?
It most likely makes more sense to show an example of an actual ad tag rather than explain what it looks like.
So here’s an example of what an HTML-based ad could look like on a browser:
And the HTML ad tag code:

Now, let's analyse it bit by bit:
<a>element: Creates a clickable area that links to the advertiser's site.hrefattribute: Specifies the URL to redirect to when the ad is clicked.targetattribute: Determines how the linked document will open.<img>element: Displays the ad image.srcattribute: Points to the location of the ad image.altattribute: Provides text alternative for the ad image.widthandheightattributes: Define the size of the ad image.
Additional elements you may find on an ad tag are:
- The
<div>element defines where on the page the ad will appear. - The
<script>tag sources the ad content from the ad server's URL. - Parameters such as
<adzone>,<adsize>, and<userid>may specify the ad placement, size, and target user profile.
This is a simplified example of an ad tag. More complex ad tags may include more detailed information about the <publisher>, the <zone> (where on the page or in the app the ad will be placed), and many other parameters that describe the exact properties, targeting and format of the given ad.
Types of Ad Tags
There are two main types of ad tags - synchronous and asynchronous ad tags.
Synchronous Ad Tags
Synchronous ad tags load simultaneously with the web content if not already before.
With synchronous ad tags, the first tag on the page will be loaded before heading on to the next one. This will happen until all ad tags on the page are loaded. This means that if the ad server-publisher connection is interrupted or a part of the code is broken along the way, synchronous tags can slow down the page load speed or even prevent it from loading.
Asynchronous Ad Tags
Asynchronous ad tags load independently of the web content and do not have to wait for the previous ad tags to be loaded. Since they load independently from the web content, asynchronous tags do not affect the page's loading time.
Asynchronous ad tags load faster than synchronous tags and are generally preferred for that reason. With asynchronous ad tags, if an error occurs, the page will load just fine, however, the ad won't be displayed.
Other types of ad tags
There are also different types of ad tags depending on the ad you are looking to display. Here are the most common ones;
-
Standard Display Ad Tags
These ad tags are used for the traditional display ads on web pages or in apps. These are often HTML or JavaScript-based.
-
Video Ad Tags
These are specialized tags used for serving video ads, typically in VAST (Video Ad Serving Template) or VPAID (Video Player Ad Interface Definition) format, which are designed to work with video players.
-
Rich Media Ad Tags:
Used for interactive or animated ads that often require more complex scripting to enable user interaction or multimedia content.
-
Retargeting Ad Tags:
These tags are placed on certain pages to track user behavior and serve targeted ads based on previous interactions with the website.
-
Dynamic Ad Tags:
These tags enable the display of ads that are dynamically generated based on real-time data, such as inventory levels, user location, or time of day.
-
Responsive Ad Tags:
These ad tags allow ads to adjust in size and format to fit different screen sizes and orientations, ensuring a proper display on all devices.
-
Search Ad Tags:
Embedded in search engine results pages, these tags trigger ads related to the user's search query.
How do Ad Tags Work?
When a user visits a website or uses an app with these tags, the code triggers a request to the advertiser's server, carrying details about the user and the context in which the ad will appear.
The advertiser's server then analyzes this information, selects the most appropriate ad based on targeting criteria, and sends it back to be displayed to the user. This allows advertisers to deliver tailored advertising content, that is as relevant to the user as possible.
Ad tags also collect data on how users interact with ads, such as the number of times an ad is viewed (impressions), clicked on, or leads to a conversion (like a sale or sign-up). This data is invaluable for advertisers who want to understand the impact of their campaigns and optimize them in the future.
In essence, ad tags are an important aspect of digital advertising, facilitating the targeted display of ads, and enabling detailed performance analysis.
How to Create Ad Tags on Google Ad Manager
Coding manually each ad tag can be a draining and time-consuming task if you want to ensure tagging consistency across your ads. But don't worry, Google Ad Manager allows you to customize and generate ad tags without having to edit code manually.
That is done by following these steps:
-
Log into your Google Ad Manager account
-
Click on inventory and find the ad unit section to the left.
-
Select the kind of ad unit you want to create an ad tag for and click Generate Tags. Here you'll see several options where you can pick the type of tags you want to use.
-
Pick the one you want and click continue. On the following page, you will be able to make additional choices based on the chosen tag type.
-
Click continue, and you're done! You can copy the tags and start implementing them in the source code for your chosen web pages.
How to create Ad Tags on Zuuvi
Google Ad Manager is perfect if you want to work with sophisticated elements and fully leverage user data for personalised advertising experiences.
However, you can integrate all the sophistication of Google Ad Manager with an even easier ad tagging experience, by creating your ads and ad tags on Zuuvi.
This is done in the following steps:
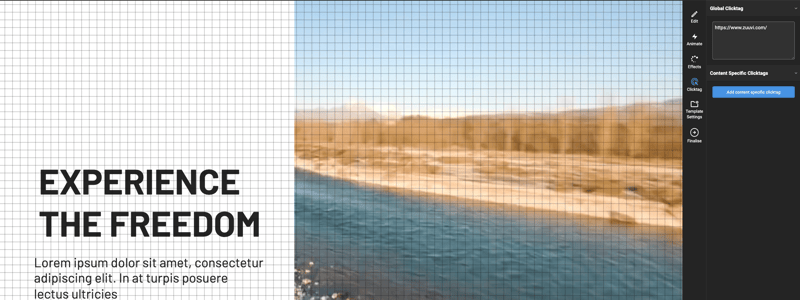
- In the Zuuvi Studio, select your ad template, open the click tag tab, and paste the URL you would like your ad to redirect to. Save and publish your ad template.

- Open the Zuuvi Campaign Manager, and add the published template to the campaign of your choice.

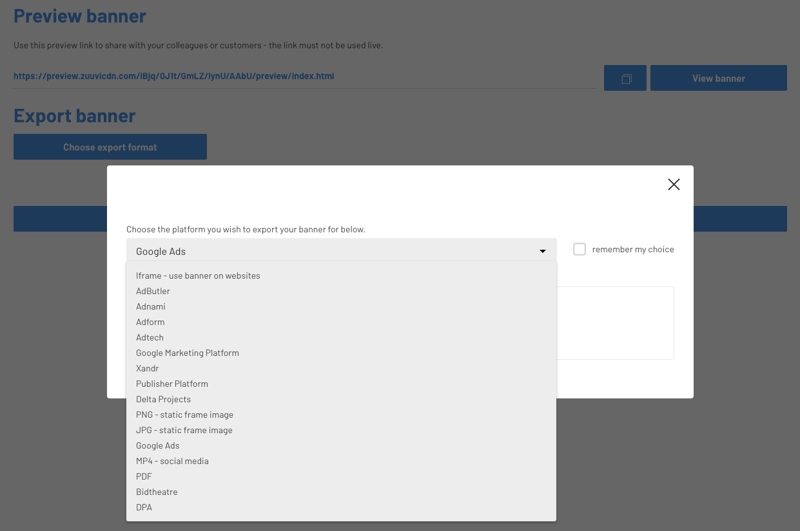
- Click the 'Export' button, select the ad server you wish to export your ad to, and boom! You'll receive a fully working ad tag on your HTML5 content, which you can place on Google Ad Manager for targeting and geolocation.


