Display Ad Production 101
Hello there, and welcome to Display Ad Production 101! In this guide, we’ll take you through the ins and outs of display advertising production, from choosing the right DSP (more on that later) to best practices that will make you create superior display ads much faster.

Whether you're a seasoned marketer or just starting out, this guide will give you the knowledge you need to craft tons of click-smashing banner ads. So, let's dive in!
List of Content
- Module 1: Learning the Basics
- What are display ads?
- Why do you need display ads?
- Module 2: Technical Specs, DSPs and Ad Production Platforms
- Media Buying Platforms
- What is a DSP?
- Ad Production Platforms
- Design Platforms
- Creative Management Platforms
- Graphic Editors
- Module 3: Banner Types, Ad Elements and Click Tags
- Static Banners
- Animated Banners
- Video Banners
- High Impact Banners
- Dynamic Banners
- Ad Elements
- Clicktags and UTMs
- Module 4: Versioning, Feedback and Tracking
- Versioning
- Feedback Looping
- Measuring Success
- Module 5: Best Practices to Take Your Ads to the Next Level
- Scale Ad Production with Design Automation
- Personalise Your Ads with Dynamic Creative Optimisation
- No-code HTML5 Production
- Third-Party Hosting
- Split Testing
- Resources
Module 1
Learning the Basics
Like every guidebook, let’s start with some definitions. If you want to skip to the juicy bits, you can move here.
What are display ads?
Display ads, also known as banner ads, are a form of online advertising that appears on third-party websites.
Chances are, you probably see display ads every time you browse through an article or shop online.
Display ads typically use images, text, videos, or interactive elements to push the advertiser's message, and contain a URL to link back to the advertiser’s product or service page.
.png?width=900&height=540&name=image%20(14).png)
Display ads come in a variety of formats, sizes and types, depending on the elements you use or the platform you or your team use for media buying.
However, we can roughly split display ad formats into 4 distinct categories: square, leaderboard, skyscraper, and mobile.

As you gain experience, you'll become skilled at identifying specific display ad names, just like the ones showcased in the image above.
Finally, the big question:
Why do you need display ads?
We’ve covered most of the benefits of integrating display advertising into your marketing strategy in this article. In a nutshell, if you are a designer, display ads allow you to:
1. Create lots of ads easily: You can get started with as little as an image and a URL.
2. Experiment with your creativity: You can add complexity to your ads and make your messaging more engaging with rich media elements like animations or videos.
3. Increase your brand's visibility: You can take advantage of the extra visibility to boost your brand identity in the eyes of your audience.
Likewise, if you’re a performance-driven marketer, display ads help you:
1. Reach a wider audience / drive more traffic to your website: According to Google, you can reach 90% of all users on the internet.
2. Reach customers at every stage of the funnel: From need awareness to purchase, your display ads can reach your audience either with custom intent or contextual targeting.
3. Give you the cheapest CPM: Display ads will give you 12x cheaper impressions than paid search ads, and 10x cheaper ones than paid social media ads.
So, if you are not producing display ads already, there’s a lot you’re missing out on.
All right, you have completed module one of our guide! Now, pat yourself on the back, get some extra coffee, and get ready to learn how to display ad production works.
Module 2
Technical Specs, DSPs, and
Ad Production Platforms
During the pre-production phase, you’ll be laying the groundwork for your ad creation process. Here, you'll be brainstorming ideas, conducting market research, and defining your target audience.
It's the time for exploration and creativity, where you'll be sketching out concepts and mapping out your ad campaign strategy.
It’s also the time to pick your design and media buying platforms - a.k.a. the tools you’ll use to produce and place your ads.
And now that we’ve introduced these two platforms, it’s time for some more definitions. Huzzah!
Media Buying Platforms
Before you start producing ads, you need to choose where you are going to sponsor them. In other words, what you need is a DSP.
What is a DSP?
A demand-side platform (DSP) is an automated ad-buying platform, where advertisers and agencies go buy online “space” on various websites, videos and SERP. This space is also known as “digital ad inventory”. Examples of ad inventory include banner ads on websites, mobile ads on apps and the mobile web, and in-stream videos.
DSPs are integrated into multiple ad exchanges, meaning you won’t have to go site by site to pitch and buy ad space for your ads.
“But wait: can’t I choose a DSP after my ads are ready to go?”
Not really, and for a simple reason: depending on the platform you choose, the size, weight and file type of your ads will change accordingly.
So let’s take a look at the most popular DSPs out there:
What DSP to choose, and why? The answer depends on your ad production requirements.
- If you are completely new to display advertising, Google Ads might be the right DSP to start from. It's the most straightforward platform, with plenty of courses to help you get started.
- If you or your team are using Google Ads and would like to level up your display advertising and test with dynamic and high-impact ads, any of the other DSPs will just do the trick.
All right, enough about DSPs. Let’s take a look at the platforms where you’ll produce your banner ads.
Ad Production Platforms
When it comes to production platforms, the world is your oyster. You have an increasing number of platforms to choose from, each with its list of features, benefits, and price tags. So go out there and pick your favourite!
However, before you go, you need to know that production platforms are split into three main categories:
1. Design Platforms
2. Creative Management Platforms
3. Graphic/Photo/Video Editors
Stick around, and we’ll explore the pros and cons of each right here.
.png)
Design Platforms
Design platforms are great entry-level, free-to-use tools that allow you to create effective static ads quickly. They usually offer live collaboration features and a large library of templates to maximise speed and efficiency.
Pros
✅ Free to use
✅ Easy to learn
✅ Built-in collaboration features
Cons
❌ Limited functionalities
❌ Only supports static images
❌ Not scalable
❌ Limited support
❌ Limited customisation
Creative Management Platforms
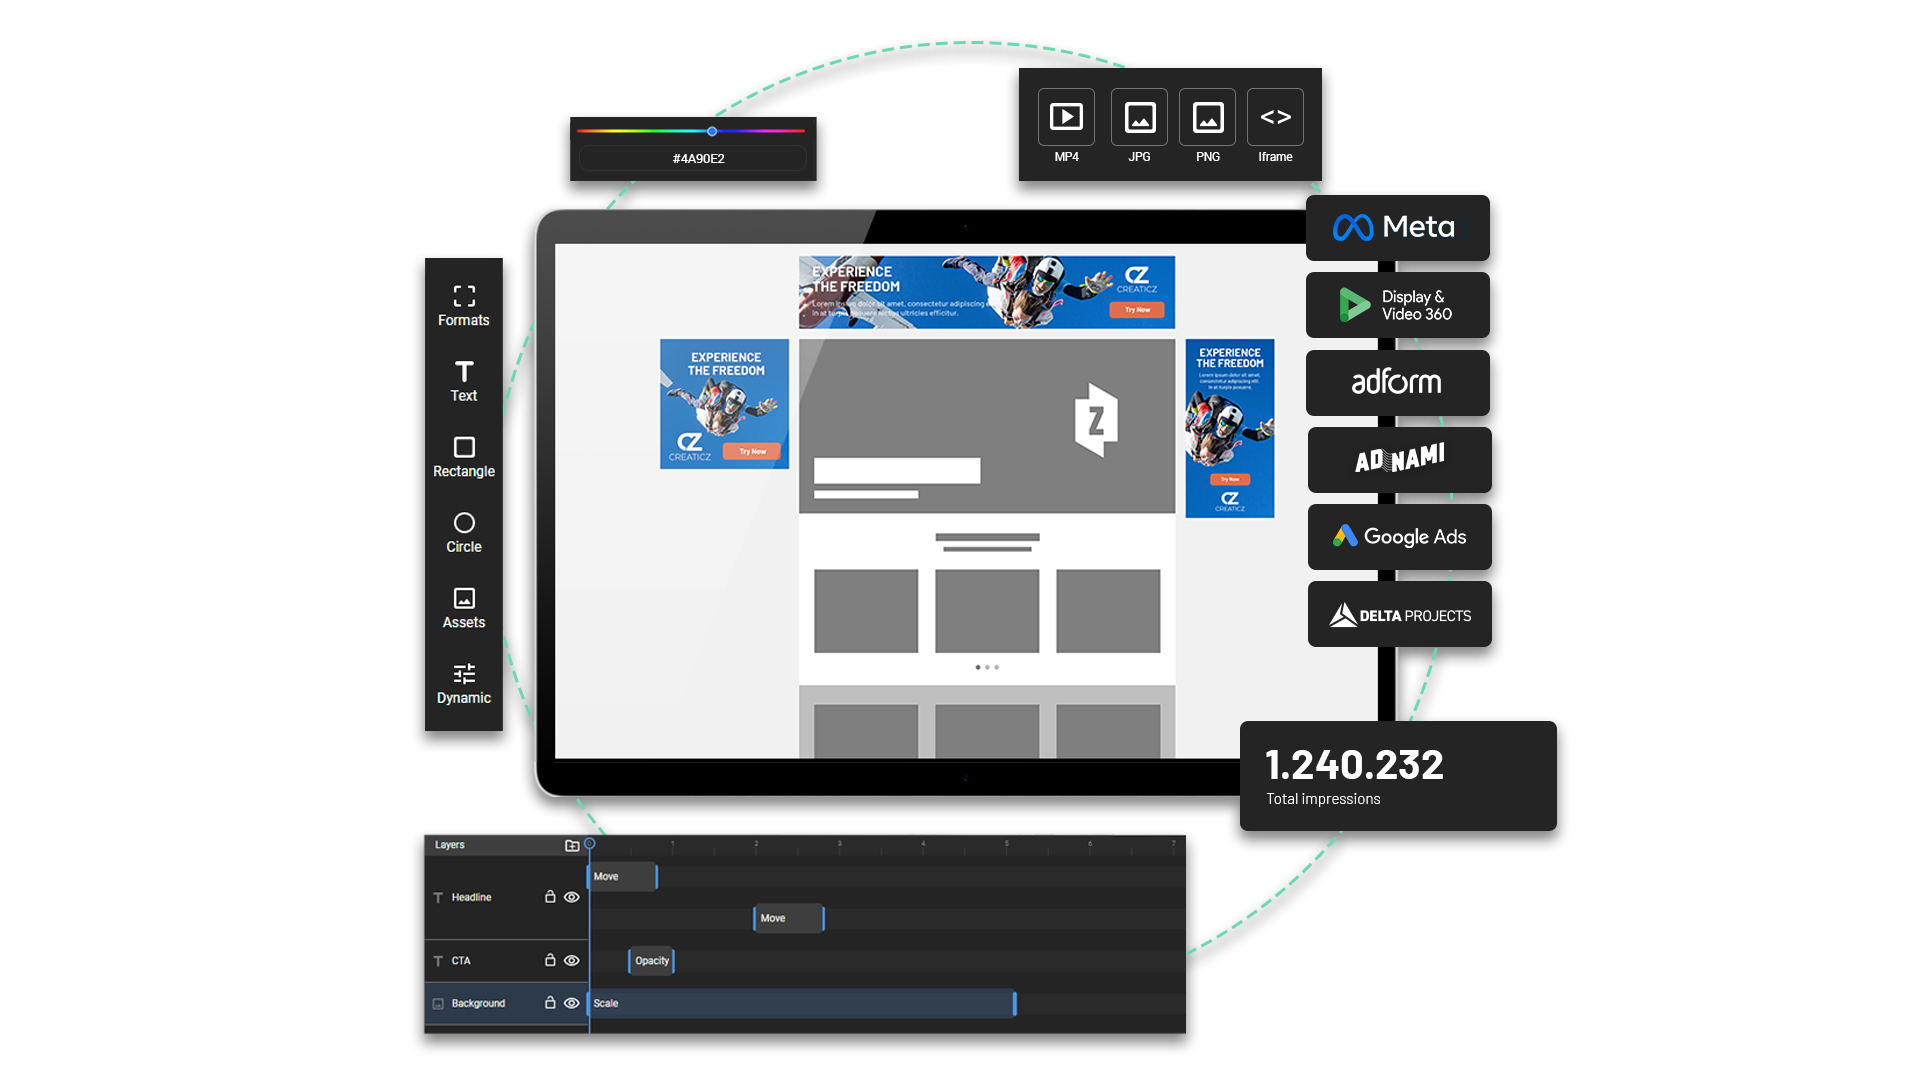
Creative Management Platforms are software optimised for ad creation and editing. They combine the creative flexibility of professional editors with the user-friendliness of free design platforms.
Pros
✅ Optimised for ad production and scaling
✅ Can create multiple ad types in one platform
✅ Built-in collaboration features
✅ Premium support
✅ Automatic HTML5 coding
✅ Can edit live ads in real time
Cons
❌ Limited general design functions
❌ Focused only on ad creation
Graphic Editors
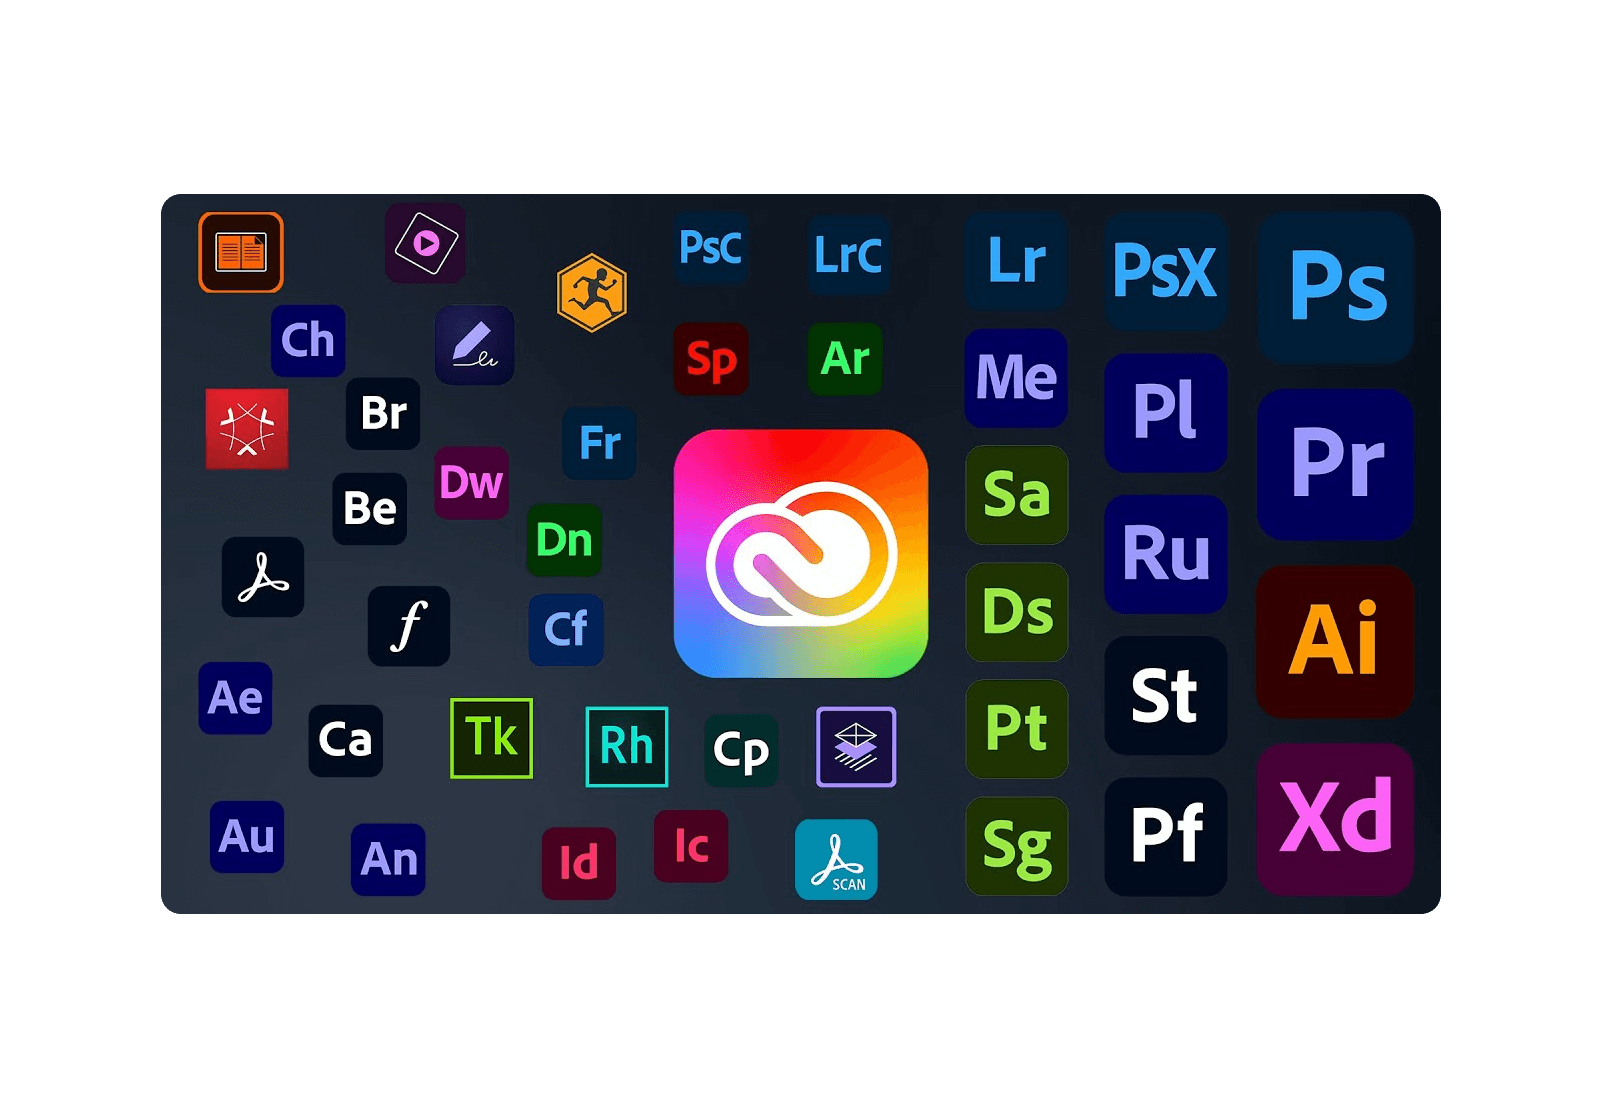
Graphic editors are advanced tools for visual creation and editing. Experienced designers usually favour them for their advanced features and extensive library of visual elements.
Pros
✅ Can create multiple ad types
✅ Hyper-focused features and resources
Cons
❌ Require multiple tools to create an ad
❌ Require manual HTML5 coding
❌ Steep learning curve
❌ Limited Support
❌ Limited collaboration functions
❌ Not scalable
And that’s it! You have now completed module two of our guide! You should now have all the info you need to pick the best design and media-buying tools and start producing your own banner ads.
Module 3
Banner Types, Ad Elements and Click Tags

Static Banner Ads
Static ads are the OGs of display advertising. They consist of a single image, a headline and a URL linking to your product page.
Pros
✅ Easy to create
✅ Fast to produce/edit/publish
✅ Scalable
✅ Low production and hosting costs
Cons
❌ Low engagement
❌ High competition
❌ Limited ability to convey information
-> Get inspired by more Sif Jakobs ads!
.gif)
Animated Banner Ads
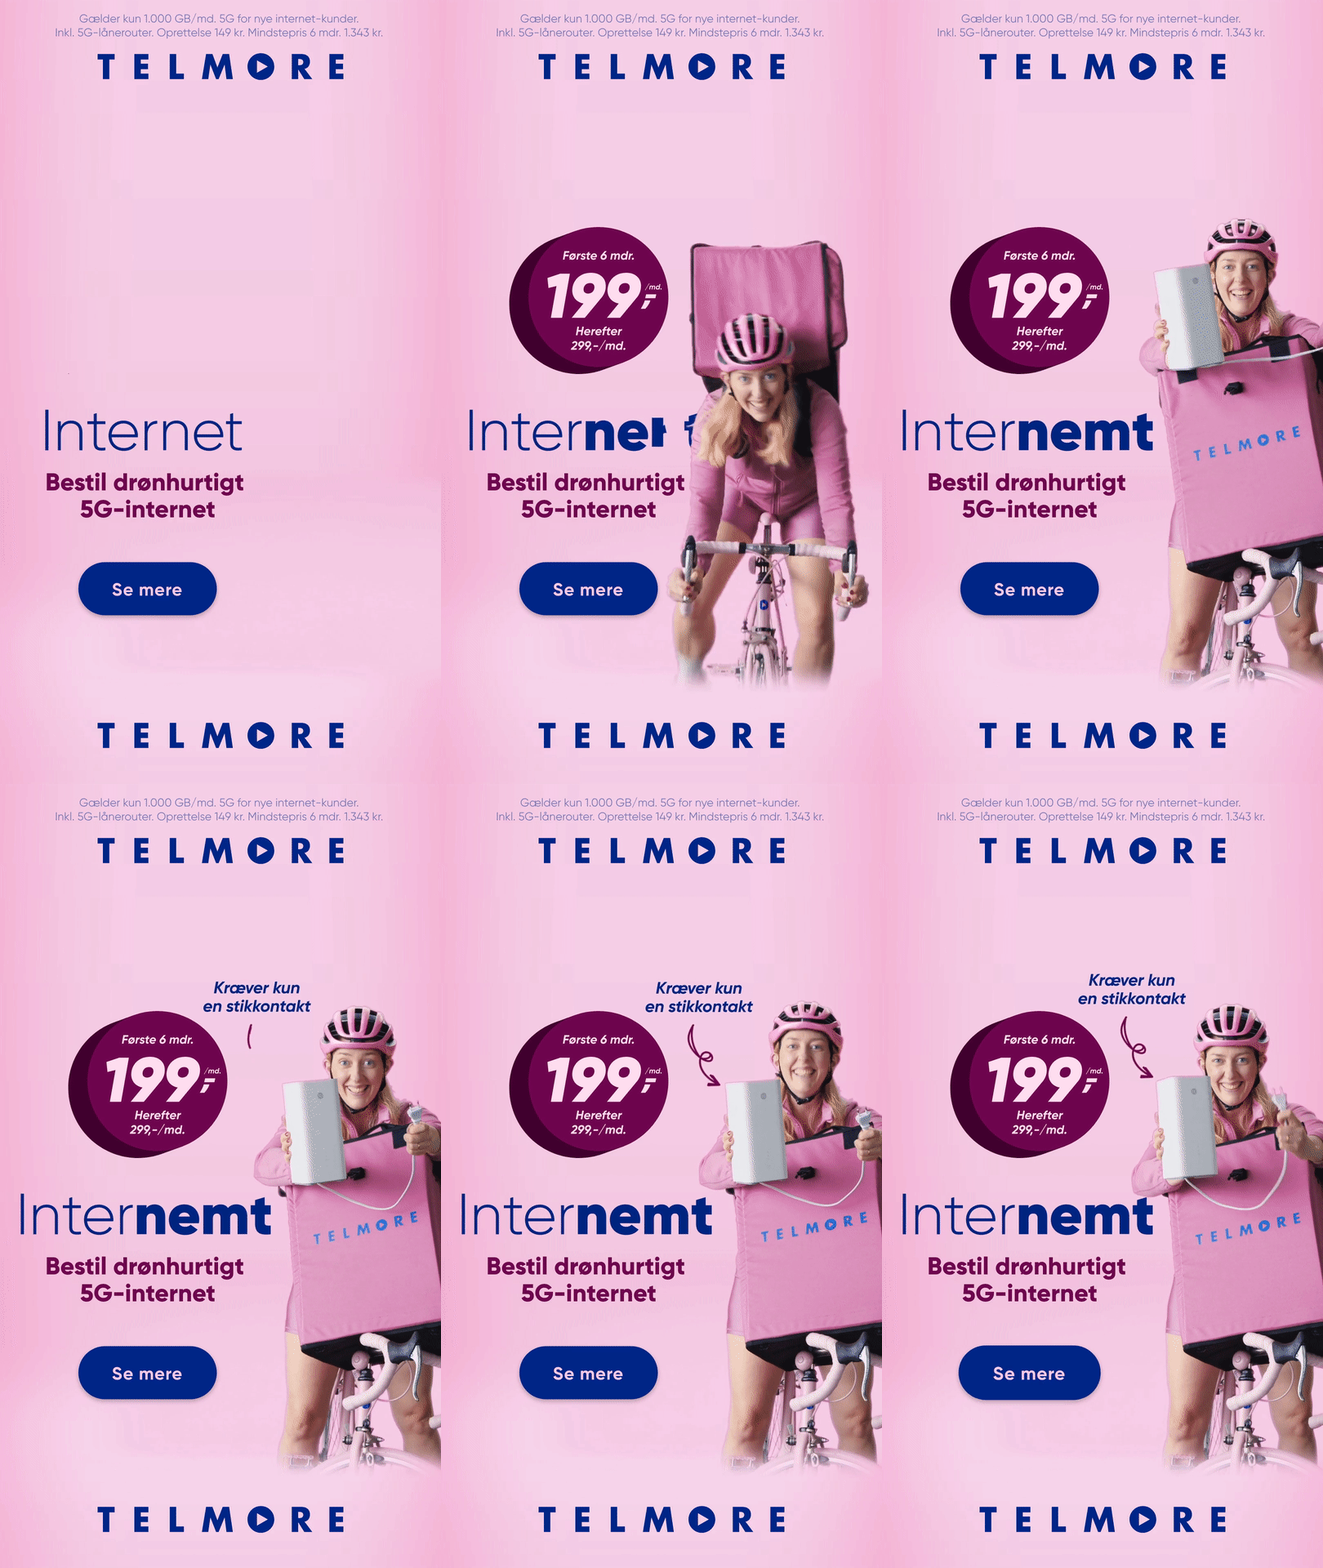
Animated banners are the first kind of rich media ads. Animated ads allow your still elements to tell a story and capture attention through motion.
Pros
✅ Mid-High engagement
✅ Better storytelling
✅ Easy to create (with a Creative Management Platform)
✅ Low hosting costs
✅ More interactive
Cons
❌ Need HTML5 coding (without a Creative Management Platform)
❌ Longer production/editing/versioning time (without a Creative Management Platform)
❌ Can be intrusive
Video Banner Ads
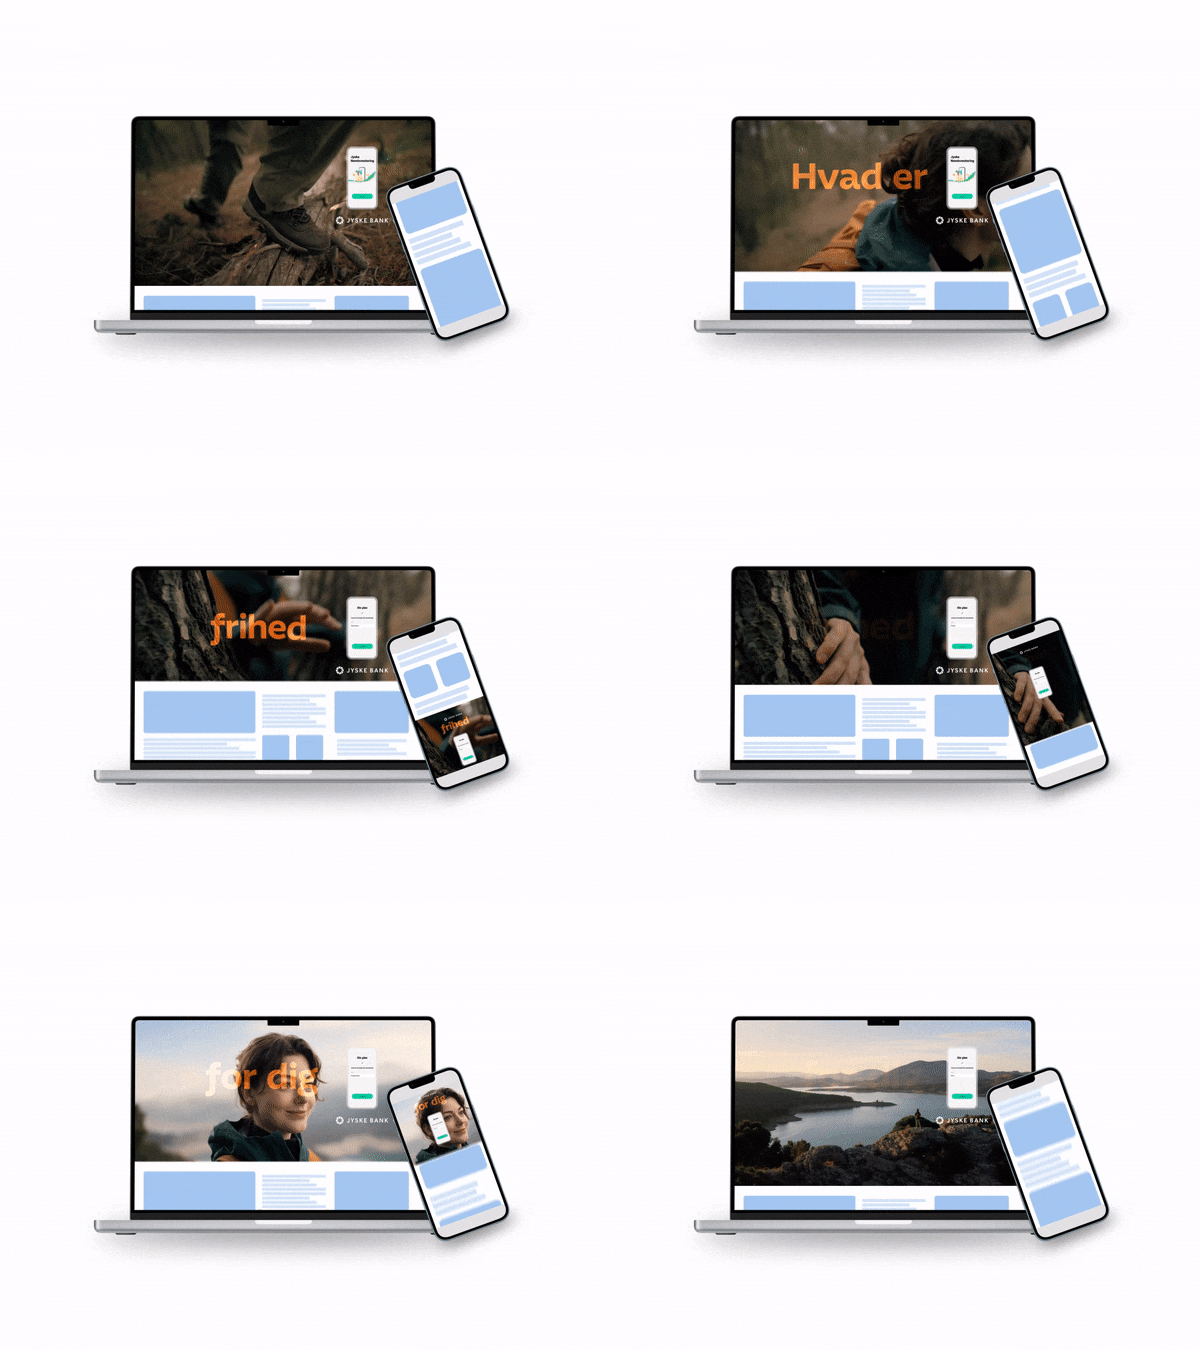
Moving up the creativity ladder, we’ve got Video ads! If you have long-form campaign videos, video banners are the perfect place to splice and dice your creatives into highly engaging rich media creatives.
Pros
✅ One video = many ads
✅ High engagement
✅ Best storytelling
✅ Can combine with animated elements
Cons
❌ Need HTML5 Coding (without a Creative Management Platform)
❌ Expensive to host/promote on DSPs (without third-party hosting)
❌ Requires high-cost video creatives
High Impact Banner Ads
If you really want to make a creative statement, high-impact banners are your best bet.
High Impact banners can be:
- Full-page takeovers
- Digital skins, also known as wallpapers
- Large-canvas displays
- Interactive banners
Pros
✅ Same as video ads
✅ Unskippable
Cons
❌ Same as video ads
❌ Can be intrusive
-> Take a sneak peek at our customer's best High Impact Banners
So, what banners should you create? We've analysed over one billion impressions and 1000s of ads created with our creative management platform, and here's the verdict:

1. If you have the right assets, you should always aim for either video or high impact banners. These two banners consistently have the highest Click Through Rates, making them well worth the production time and investment.
2. If you cannot produce videos for one reason or another, then always aim to make your ads animated. As previously stated, static ads may be quick to make, but by adding basic animation elements like a subtle fade-in transition or a pulse effect in your CTA, you'll gain a 2x boost on your CTR. And with a Creative Management Platform, adding these animations will take only a few minutes!
Ad Elements
You now know all the types of display/banner ads you can produce.
Now, let’s get one step further. From the simplest static ad to the most ludicrous high impact banner, you’re going to need a set of visual and copy elements, such as a headline, a visual, and a call to action.
.png?width=1781&height=600&name=Frame%2014%20(2).png)
To create these elements, you are going to need assets like fonts, icons, images and a good dose of creativity, not to mention the production tools to edit these elements and build your ads from scratch. And all these (yes, even the creative mind behind your ads) usually don't come cheap...
Lucky for you, we have compiled our favourite free stock image, font and icon libraries in our Designer Cheat sheet, which you can get for free! Just click the link below when you are ready to produce your first ad!
Clicktags and UTMs
Finally, all your banners are going to need a link and a click tag.
UTM codes empower marketers to gain granular insights into the performance through accurate tracking, analysis, and optimisation of marketing efforts, ultimately making data-driven decisions to improve ROI.
Therefore, adding the right structure of what to put in each source, medium, campaign, term and content is vital.
In the case of display ads, “google” / “adform” would make natural source inputs and have “display” as the medium.
So here’s the bookmark-worthy tip! We’ve created a UTM Builder template for you to use and edit to your needs. Everything you need to know about adding click tags is included.
Module 4
Versioning, Feedback and Tracking
Phew! You've made it through the production phase, congrats! Your first ad is ready. Ready to see what happens next?
Versioning
Once you have locked the design for one banner, you need to replicate it across multiple formats, markets, or products. This process is called versioning.
Versioning is a vital step in the post-production process because it ensures all versions of the banner have the same look and feel across formats. Furthermore, it helps you scale production quickly, and it gives you an overview of your creatives across formats. This helps you retain and convey the core message of your banner and your brand identity.
However, versioning can also be an exceptionally long and tedious process. After all, nobody wants to do from scratch the same ad over and over again.

Creative Management Platforms speed versioning up by an order of magnitude. Starting from a design template, you can import all your elements and animations across formats, enabling you to create multiple versions of the same ad in a matter of minutes.
These platforms can also automate your production if you need to update only your ad's content. Just provide the platform with your design template and the data to populate your new ads.
Feedback Looping...and how to cut it by 90%!
Unless you’re a marketing one-man band, you’re going to submit your creatives for approval. And chances are, there will be some feedback that will push your ads back to production.
That’s easy enough if you are dealing with static ads only, but what about rich media ads in HTML5 code? Typically, that would mean editing your mock-up and asking a developer to repeat your changes in HTML5 language. Across multiple formats. For as many feedback rounds as necessary. Grinding your ads to a halt for weeks at a time.
-3.png?width=900&height=506&name=image%20(1)-3.png)
...Frustrating enough?
With Creative Management Platforms, the feedback loop is thankfully much shorter and simpler. Since you don’t have to code in HTML5 your reach media banners anymore, the mockup-coding-feedback loop is cut one step short.
-1.png?width=900&height=506&name=image%20(4)-1.png)
In addition, Creative Management Platforms can help you avoid the hassle of physically distributing bulky ad folders and waiting for feedback. These platforms often provide live commenting features on editable files or preview links to your campaign banners, allowing you to easily share them and make your ad production process more flexible.
How to Measure Your Ads' Success Every Step of the Way Funnel
Your ads are now live! Curious to know how they’re performing? There’s an infinite list of metrics and fancy acronyms you can keep track of, but everything really boils down to what the goals of your ads are.
And usually, these can be ascribed to three categories:
1. Top Funnel (TOFU) - Brand Awareness: if the goal of your ads is to raise awareness and be seen by as many people as cheaply as possible, then you need to take a look at any metric that can indicate the relevance, quality, and reach of your ads. To that end, you should look at metrics like the number of impressions, the viewability, and the Cost per Mille (CPM) of your ads.
2. Middle of Funnel (MOFU) - Generate an Interest: if your ads' goal is instead to drive traffic to a particular landing page or your site you need to look for anything that signals your users' interaction with your ads, such as their number of clicks, Cost per Click (CPC), and Click-through Rate (CTR). Furthermore, if you are hosting an event and want to know how many people have signed up, you might want to check for any soft conversion indicator, such as the Cost per Lead of your ads.
3. Bottom of Funnel - Convert (BOFU): Finally, if the goal of your ads is for the user to complete a "converting" action, such as the purchase of a product, the sign-up to a mailing list, or the booking of a demo, then you want to look for your ads' Cost per Acquisition (CPA), Number of Conversions/Purchases, Return on Investment (ROI), and Return on Ad Spend (ROAS).
Module 5
Best Practices to Take Your Ads to the Next Level
It's time to gather all our wisdom and share some best practices for banner ad production. Here are a couple of tips to help you elevate your game.
1. Scale Ad Production with Design Automation
As previously mentioned, manual ad production is a grind. It requires a designer to work on hundreds of slightly different banner ads, weeks to complete and slows your programmatic campaigns to a crawl.
By automating your digital advertising production, you’ll be able to remove all the manual and repetitive tasks of ad creation and obtain better creatives, much faster, and at scale.

How is that possible? If you free up your designers from the day-to-day grind of manual ad production, they can focus their efforts on creating a few high-quality rich media master templates.
You can then feed these templates with all your copy and product iterations to a Creative Management Platform with integrated automation technologies, and create hundreds of versions in minutes.
The result? Ads produced 90% faster and converting 3x better.
2. Personalise Your Ads with Dynamic Creative Optimisation
Taking one step further from automated production, DCO or Dynamic Creative Optimisation is a method that allows you to create personalised creatives using a combination of data and creative templates.
At the heart of DCO lies a sophisticated algorithm that constantly analyses and processes vast amounts of data like the viewer's demographics, interests, browsing history, and even the context of their current webpage.
Imagine a person browsing your sports online store, checking for a particular type of running shoes, but stopping at checkout. With DCO, you can create hyper-relevant banner ads, displaying the type of shoes the person was looking for, with discounts applied or free shipping.
The best part? The entire process is automated, using real-time user data, your product data, and a master ad template. Oh, and it’s incredibly easy too with a Creative Management Platform like Zuuvi…
3. No-Code HTML5 Production
We’ve already spilled the beans on this one, so it should be a no-brainer by now. HTML5 coding is redundant, time-consuming and cumbersome.

With a no-code Creative Management Platform like Zuuvi, your banners are automatically turned into HTML5 code as you design them. This saves you time, money, and coding resources you can use elsewhere. Win-win-win.
4. Live-Optimise with Third-Party Hosting
When using a third-party hosting service for your banner ads, you'll gain more control over your ads and save on your media-buying budget.
How? With third-party hosting, you’ll be able to upload, track, and update your banner ads in real-time, making sure your messaging is up-to-date and always relevant.
Furthermore, when doing media buying, one of the key factors DSPs take into account is whether your banner is Rich Media or a standard display. When using a third-party hosting service, you'll be able to host your rich media files there and pay your DSP only the cheaper standard display fee!
5. Keep Refining Your Ads with Split testing
Split testing your banners is key if you want to identify the most compelling elements of your ads, optimise your banners and achieve higher campaign performance with data-driven insights.

And if you embrace the full potential of Creative Management Platforms, you can produce multiple variants in minutes and run split tests across different variables effortlessly.
Wrapping up
There you have it – Banner Ad Production 101! We hope this crash course has given you a solid head-start to create your dazzling ads.

So, go young advertising padawans, and make your old masters proud with some truly outstanding creatives!
And remember, if you want to make your ads truly shine with a top-notch ad Creative Management Platform, click the button below and try Zuuvi for free! 👇
Resources
-
In case you get lost: Glossary
-
DSP breakdown


